#Arduino-compatible sensors and modules
Explore tagged Tumblr posts
Visit Tumblr Blog
Explore Tumblr blogs with no restrictions, modern design and the best experience.
Last Seen Tumblr Blogs


Fun Fact
Tumblr is used by 21% of adults online aged 18-29 years.
Text
Unleash Your Creativity with Arduino DIY Kits from Diykit Solutions
Are you ready to dive into the exciting world of electronics and robotics? At Diykit Solutions, we offer a diverse range of DIY kits that empower you to unleash your creativity. Our kits feature high-quality materials sourced from trusted suppliers, ensuring that you can build innovative projects with confidence. Whether you’re a hobbyist, educator, or professional, our Arduino-compatible products will help you turn your ideas into reality.
Explore Arduino-Compatible Sensors and Modules
The world of Arduino opens up a universe of possibilities, especially when you explore the extensive range of Arduino-compatible sensors and modules available at Diykit Solutions. These components are essential for anyone looking to enhance their projects with sensory feedback, interactivity, and automation.
What are Arduino-Compatible Sensors?
Arduino-compatible sensors allow you to collect data from the environment. Whether you’re working on a weather station, a smart home project, or a robotic system, these sensors can help you gather crucial information such as temperature, humidity, light levels, and motion detection. Our collection of sensors is designed to seamlessly integrate with various Arduino boards, making them an ideal choice for your projects.
Enhance Your Projects
By incorporating Arduino-compatible sensors and modules, you can create projects that respond to real-world conditions. For instance, you can use a temperature sensor to trigger an action when the temperature exceeds a certain threshold or a motion sensor to activate lights when someone enters a room. The possibilities are endless!
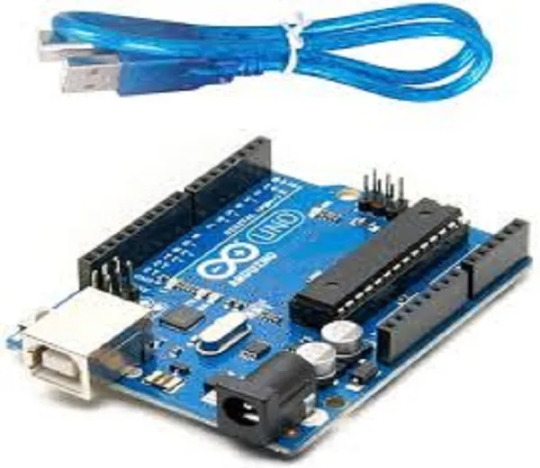
Build with the Arduino UNO R3 Board ATmega328P DIY Kit
The Arduino UNO R3 Board ATmega328P DIY Kit is a fantastic entry point for anyone interested in electronics and programming. This versatile board is one of the most popular Arduino models and serves as the backbone for countless projects.
Key Features of the Arduino UNO R3
User-Friendly: The Arduino UNO R3 is easy to use, even for beginners. With its straightforward design and compatibility with the Arduino IDE, you can quickly write, upload, and run your programs.
Versatile Connectivity: The board features a variety of input and output pins, allowing you to connect a wide range of sensors, actuators, and other devices.
ATmega328P Microcontroller: The powerful ATmega328P microcontroller ensures that your projects run smoothly and efficiently, enabling complex functionalities without compromising performance.
Ideal for Beginners and Experts
Whether you’re just starting your journey in electronics or looking to create more advanced projects, the Arduino UNO R3 Board ATmega328P DIY Kit has something to offer everyone. With the right resources, you can learn programming, circuit design, and the basics of robotics.
Discover the Arduino-Based Robotics DIY Kit
Robotics is an exciting field that combines engineering, technology, and creativity. With our Arduino-Based Robotics DIY Kit, you can embark on your robotics journey and build your own robots from scratch.

What’s Included in the Kit?
Our robotics kit includes everything you need to create functional robots, including:
Arduino Board: The core of your robot, responsible for processing and controlling its functions.
Motors and Wheels: For movement and mobility, allowing you to create wheeled robots that can navigate their surroundings.
Sensors: To enable your robot to interact with its environment. Use ultrasonic sensors for obstacle avoidance or line-following sensors for navigation.
Learn and Experiment
This kit not only helps you build robots but also teaches you the principles of robotics and programming. By experimenting with different configurations and programming techniques, you can develop your skills and gain a deeper understanding of how robots work.
Explore the Arduino R3 SMD Micro Controller Board Kit
The Arduino R3 SMD Micro Controller Board Kit is another excellent option for those looking to create innovative electronics projects. This compact board offers a range of features that make it suitable for various applications.
Key Benefits of the R3 SMD Board
Compact Size: The SMD (Surface-Mount Device) design allows for a smaller footprint, making it ideal for projects with space constraints.
Integrated Features: This board comes equipped with essential features such as built-in USB connectivity, allowing for easy programming and communication with your computer.
Robust Performance: Designed for reliability and efficiency, the R3 SMD board can handle a variety of tasks, making it suitable for both beginner and advanced projects.
Perfect for Prototyping
Whether you’re prototyping a new idea or creating a final product, the Arduino R3 SMD Micro Controller Board Kit provides the flexibility and functionality you need. Its robust design and compact size make it an excellent choice for any electronics enthusiast.
Why Choose Diykit Solutions?
At Diykit Solutions, we are committed to providing high-quality DIY kits and components that inspire creativity and innovation. Here are some reasons why you should choose us for your Arduino projects:
Diverse Product Range: We offer a wide variety of DIY kits, sensors, and modules to cater to all your electronic and robotic needs.
High-Quality Materials: All our products are sourced from reputable suppliers, ensuring that you receive only the best components for your projects.
Customer Support: Our dedicated team is here to assist you with any questions or concerns you may have. We aim to provide a seamless shopping experience.
Educational Resources: We believe in empowering our customers with knowledge. Our website features tutorials, project ideas, and guides to help you get the most out of your DIY kits.
Start Your Creative Journey Today!
Ready to dive into the world of electronics and robotics? Explore our extensive collection of Arduino-compatible sensors and modules, as well as our Arduino-Based Robotics DIY Kit, Arduino UNO R3 Board ATmega328P DIY Kit, and Arduino R3 SMD Micro Controller Board Kit. At Diykit Solutions, we provide everything you need to unleash your creativity and bring your ideas to life.
Whether you’re a beginner looking to learn or an expert seeking to expand your toolkit, our DIY kits are perfect for anyone passionate about electronics. Don’t wait — start creating innovative projects today!
0 notes
Text
Harnessing SMS for Smarter Homes: The Future of Automation
Unlocking the Power of Text: How SMS Revolutionizes Smart Home Control
In the rapidly evolving world of smart home technology, communication methods play a crucial role in how homeowners interact with their devices. Among these methods, SMS (Short Message Service) has emerged as a simple yet powerful tool to enhance automation and security. This article explores the significant role of sms in smart home automation and how it offers a reliable, accessible, and cost-effective way to control and monitor your home environment.
Understanding the Significance of SMS in Smart Home Ecosystems
SMS is a universally accessible communication method that relies on cellular networks, making it independent of internet connectivity. This attribute makes it especially valuable for smart home systems, which require reliable alerts and commands even during internet outages. Unlike app-based controls, SMS can reach users directly via their mobile phones, ensuring immediate notification for critical events like security breaches, smoke detection, or system malfunctions.
Enhancing Security with SMS Alerts
Security is a primary concern for homeowners, and SMS plays a vital role in providing instant alerts. When a security sensor detects movement, a door is forced open, or smoke is detected, an automated SMS alert can be sent to the homeowner’s mobile device. This immediate notification allows swift action, whether that involves contacting authorities or remotely shutting down certain devices. The simplicity and immediacy of SMS make it ideal for critical alerts where every second counts.
Control Devices with Text: Convenience and Flexibility
Controlling smart devices via SMS offers a straightforward method that doesn't require smartphone apps or internet access. Homeowners can send predefined commands through text messages to turn on lights, adjust thermostats, lock doors, or activate security cameras. This feature is particularly useful for elderly users or those who prefer minimalistic control options. Setting up such commands involves integrating SMS gateways with the home automation system, providing a seamless and customizable experience.
DIY Home Automation Projects Incorporating SMS
For tech enthusiasts and DIYers, integrating SMS into home automation projects is an engaging way to learn and innovate. By using microcontrollers like Arduino or Raspberry Pi combined with GSM modules, users can create personalized automation solutions. For example, a DIY project might involve configuring the system to send SMS notifications when environmental thresholds are exceeded, or to execute specific actions in response to received texts. These projects highlight the versatility and accessibility of SMS as a control and alert mechanism.
Advantages of Using SMS in Smart Homes
Reliability: Operates over cellular networks, unaffected by internet outages.
Universality: Compatible with nearly all mobile phones and carriers.
Cost-Effectiveness: Minimal setup costs and affordable messaging rates.
Immediate Delivery: Ensures prompt alerts and commands delivery.
Challenges and Considerations
While SMS offers many benefits, it also has limitations. For instance, the character limit restricts complex commands, and message delivery can occasionally be delayed. Additionally, security concerns arise if commands are not encrypted, so implementing authentication protocols is crucial. Despite these challenges, with proper configuration, SMS remains a robust component of comprehensive home automation solutions.
The Future of SMS in Smart Home Automation
As technology advances, the integration of SMS with other communication channels like push notifications and voice assistants will further enhance smart home systems. AI-driven automation can leverage SMS for personalized alerts and controls, creating a more intuitive user experience. Developers and homeowners alike should consider the strategic use of SMS to build resilient, accessible, and secure smart homes.
In conclusion, SMS continues to be a vital tool in the realm of smart home automation, offering simplicity, reliability, and immediacy. Whether for security alerts, device control, or DIY projects, understanding and utilizing SMS can significantly elevate the functionality and security of modern homes.
0 notes
Text
Buying Electronic Components Online in India — What to Keep in Mind
Electronics is a field where small parts make a big difference. If you're building something — a simple sensor circuit, maybe a GSM tracker, or even just testing modules — sourcing the right components is half the work.
Going shop to shop looking for capacitors, ICs, or GPRS modules can be draining. Not to mention, stock may not be available, or the part isn’t original. That’s where online sellers come in.

Why Online Works Better (Most of the Time)
Instead of wasting hours traveling or calling five vendors, it’s easier to go online and search the part directly. You get to check datasheets, ratings, specs, pricing — all at once. It’s a better way to find both common and rare components.
In India, the trend is clear: more developers, students, and even R&D engineers now prefer to buy electronic components online. It's faster and often cheaper, too.
Looking for Specific Parts Like GPRS Modules?
Not every local store stocks communication modules. A GPRS module is commonly used in IoT, vehicle tracking, or remote data transmission projects. Online, you can compare multiple options, check if it’s quad-band, serial-compatible, or needs an antenna, etc. That’s hard to do in a store with no documentation or help.
Be Cautious With Semiconductors
If you’re sourcing semiconductors, ICs, or microcontrollers, don’t compromise on quality. Faulty or cloned parts can damage your boards. It’s always safer to stick with semiconductor distributors in India who have proper sourcing, and ideally, tie-ups with top semiconductor companies in India.
Use reliable sources, particularly for projects where long-term dependability is important, such as medical or industrial construction. They may be slightly more expensive, but you can avoid problems later.
The Benefits of Sites Like OM Electronics
OM Electronics provides a fair combination between working stock, clear specifications, and a respectable choice. Whether you want Arduino boards, relays, resistors, or modules, they have categories that are easy to browse. Bulk ordering is available too, which is useful for college labs or small companies.
The interface is clean, and support is better than most smaller sellers. If you're serious about online sourcing, having 2–3 such trusted sites bookmarked really helps.
Final Words
Buying electronic parts online is no longer risky like it was five years ago. With verified platforms, fast logistics, and better inventory systems, sourcing has become smoother. Just remember to avoid unknown sellers and always double-check specs before buying.
Whether it’s a sensor, GPRS module, or a logic IC, you now have more control over quality and delivery. That’s a big win for anyone working in electronics today.
#buy electronic components online#electronic components online india#electronic parts online#top semiconductor companies in india#gprs module#semiconductor distributors in india
1 note
·
View note
Text
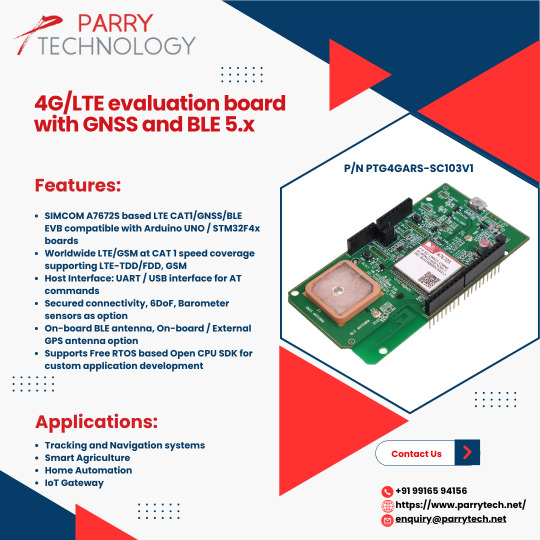
4G/LTE GNSS / BLE 5.0 Module
SIMCOM A7672S based LTE CAT1/GNSS/BLE modem compatible with Arduino
Host Interface: UART / USB interface for AT commands
Secured connectivity, 6DoF, Barometer sensors as option
On-board BLE antenna, On-board / External GPS antenna option
Operating voltage of 5V±10%
Operating temperature: -30°C to +70°C
Supports Free RTOS based Open CPU SDK for custom application development https://www.parrytech.net/4g-lte-modem/
0 notes
Text
Affordable Robotics: Finding the Best Price Robotic Kit
Robotics is an exciting and rapidly evolving field, offering opportunities for learning, experimentation, and innovation. Whether you're a student, a hobbyist, or an aspiring engineer, investing in a Best Price Robotic Kit can be the perfect way to enter the world of robotics without breaking the bank. These kits provide affordable solutions while ensuring quality and functionality, making them accessible to both beginners and experienced users.Get more news about Best Price Robotic Kit,you can vist our website!
Key Features of a Best Price Robotic Kit A well-rounded robotic kit should include essential components to facilitate learning and project development. Some key features to consider include:
Microcontroller or Development Board – Most robotic kits come with microcontrollers like Arduino or Raspberry Pi, which serve as the brain of the robot.
Sensors and Actuators – Sensors like ultrasonic, infrared, or motion detectors enhance the functionality of the robot, while actuators such as motors and servos allow movement.
Wireless Connectivity – Some kits include Bluetooth or Wi-Fi modules for remote control and programming convenience.
Easy Assembly – A user-friendly design with clear instructions ensures seamless construction and programming.
Benefits of Using a Budget-Friendly Robotic Kit 1. Cost-Effective Learning Many educational and DIY robotic kits are designed to be affordable while providing fundamental learning experiences in programming and engineering. These kits allow individuals to build hands-on projects without spending excessive amounts on high-end models.
2. Ideal for Beginners A best-price robotic kit often includes simple, easy-to-follow instructions, making it perfect for those new to robotics. Users can learn coding basics, mechanical design, and sensor integration through practical experimentation.
3. Encourages Creativity and Innovation Even within budget constraints, affordable robotic kits provide ample room for customization and creativity. Users can enhance and modify their robots by adding new components or integrating advanced programming features.
Applications of a Best Price Robotic Kit These budget-friendly robotic kits serve various purposes, including:
STEM Education – Schools and universities use robotic kits to teach programming, electronics, and engineering concepts interactively.
Personal Projects – Hobbyists enjoy building robots for automation, remote control, or interactive tasks.
Prototyping and Research – Aspiring engineers and researchers leverage robotic kits for developing functional prototypes and testing robotic applications.
How to Choose the Right Robotic Kit When selecting a robotic kit, consider the following factors:
Purpose: Determine if the kit is meant for education, hobby use, or professional development.
Expandability: Look for a kit with components that can be upgraded and modified as you advance.
Compatibility: Ensure the kit is compatible with common programming platforms and software like Python, C++, or Arduino IDE.
User Support: Some kits offer online tutorials, community forums, and technical support for troubleshooting and guidance.
Conclusion A Best Price Robotic Kit is a fantastic investment for those eager to explore robotics while keeping costs low. Whether you’re a beginner looking for hands-on learning or an enthusiast aiming to create innovative projects, these kits offer an affordable yet powerful solution for robotic development. By choosing the right kit with essential features, you can embark on a rewarding journey of programming, design, and automation without exceeding your budget.
0 notes
Text

ESP32 WROVER Kit, Compatible with Arduino IDE The starter kit is based on the development board from esp32 wrover. It integrates with bluetooth and wireless.A powerful dev board for IOT module project development.ESP32-WROVER series is developed by Espressif Systems, below is key features and applications are summarized: I. ESP32 Wrover Specifications - Chip Architecture - Dual-core SoC (ESP32-D0WD or D0WD-V3) with a clock speed of 80–240 MHz (dynamic frequency scaling)13 - 520 KB integrated SRAM, expandable via external SPI RAM/Flash1 - Built-in 4–16 MB SPI Flash and 8 MB SPI PSRAM (depending on model, e.g., WROVER-B/E)37 - Wireless Connectivity - 2.4 GHz Wi-Fi (802.11 b/g/n) with up to 150 Mbps throughput36 - Dual-mode Bluetooth: Classic (BT) and Low Energy (BLE)36 - Peripherals & Interfaces - SPI, I2C, UART, SDIO, Ethernet interfaces3 - Support for capacitive touch, Hall effect sensors, PWM outputs37 II. ESP32 Wrover Kit Development Environment & Tools - Programming Frameworks - Official ESP-IDF framework (FreeRTOS + LwIP stack), C/C++-based16 - Arduino IDE compatibility via ESP32 board manager28 - Optional Python/C hybrid development using Zerynth Studio5 - Hardware Debugging Tips - Use 5V power for camera modules (3.3V may cause image instability)2 - Adjust SPI pin definitions (e.g., SCK=14, MISO=12) based on hardware layout4 III. ESP32 Devkit Typical Applications - IoT Devices - Sensor networks, smart home controllers with ultra-low-power modes (sleep current Read the full article
0 notes
Text
Wemos D1 Mini Pinout: Master the ESP8266 Mini Pinout for Your Next IoT Project
If you're exploring IoT projects, the Wemos D1 Mini is a tiny but powerful board you’ll want in your toolkit. Built around the reliable ESP8266 chip, it combines Wi-Fi connectivity with a compact, breadboard-friendly design. This makes it perfect for projects like smart home automation, DIY gadgets, or even experimenting with sensors and actuators.
One of the key things you need to know is the Wemos D1 Mini pinout, as it lays the foundation for what your board can do. With 11 GPIO pins, power options (3.3V and 5V), and essential pins like TX, RX, and A0, the Wemos D1 Mini offers plenty of flexibility for small-scale IoT projects. The ESP8266 Mini pinout adds another layer of versatility, making it easy to work with various modules and devices while maintaining compatibility with standard Arduino IDE libraries.
Key pin highlights:
GPIO Pins: Ideal for connecting sensors, LEDs, relays, and more.
A0 Pin: Used for analog inputs, with a range of 0-3.3V.
TX/RX Pins: Essential for serial communication with other devices.
Power Pins: Supports both 5V and 3.3V power supplies for flexibility.
Whether you’re working on a Wi-Fi-enabled weather station, a smart light controller, or a quirky robot, understanding the Wemos D1 Mini pinout and ESP8266 Mini pinout is key to maximizing your board's potential.
Ready to dive deeper? Check out our detailed guide on pinouts here and get started with your next IoT adventure today!
#WemosD1Mini#WemosD1MiniPinout#D1MiniPinout#ESP8266Pinout#WemosPinoutGuide#Microcontroller#IoTDevelopment#ArduinoProjects#ESP8266Projects#WemosProjects#WemosD1MiniGuide#IoTDevices#EmbeddedSystems#WemosTutorial#PinoutDiagram
0 notes
Text
Arduino Projects
Arduino is a microcontroller platform made to facilitate hardware integration and programming. Each of its boards, including the Arduino Uno, Nano, and Mega, is designed to meet a distinct set of requirements. When used in conjunction with the Arduino IDE, users may easily write, upload, and execute code.
Users can design projects ranging from basic LED blinkers to intricate robotics and Internet of Things systems thanks to the platform's extensive library of sensors, modules, and components.
Top Arduino Project Ideas
System for Home Automation
An Arduino with a smartphone app can be used to control lights, fans, and other appliances. Your system can become more intelligent and energy-efficient by integrating sensors like temperature or motion detectors.
The weather station
Construct a personal weather station to track air pressure, temperature, and humidity. You can gather data using sensors like the DHT11 and BMP180, show it on an LCD screen, or post it online for remote access.
Robot That Avoids Obstacles
This well-liked project for robotics novices is teaching a robot to use ultrasonic sensors to navigate around obstacles.
Intelligent Plant Monitoring System
An Arduino-based monitoring system that measures temperature, light intensity, and soil moisture can help you keep your plants healthy. Even when it's time to water your plants, it may let you know.
Alarm System with Arduino
Create an Arduino-powered alarm system with a buzzer, keypad, and motion sensors to increase security. For workplace or home security, this project is perfect.
Pet Feeder with Automation
Construct a pet feeder that automatically delivers food depending on a weight sensor reading or at predetermined intervals.
Internet of Things Door Lock
Create a smart door lock that you can operate from a distance using Bluetooth or Wi-Fi by integrating an Arduino with an RFID scanner or fingerprint sensor.
Make Your Own Game Console
Convert an Arduino board with basic buttons and a display into a vintage game console.
How to Get Started with Arduino Projects
Select the appropriate board:
Choose an Arduino board based on the needs of your project. The Arduino Uno is an excellent place to start for the majority of novices.
Assemble the parts:
Determine the sensors, actuators, and other parts your project needs. A wide range of Arduino-compatible components are available on websites like Adafruit, SparkFun, and Amazon.
Set up the Arduino IDE:
Install the Arduino IDE by downloading it from Arduino.cc. You can develop code and upload it to your board using this software.
The universe of creativity and invention is unlocked by Arduino projects. Arduino offers the resources and network to realize your ideas, whether you want to study robotics, automate your house, or develop a ground-breaking technology.
Explore the world of Arduino now and unleash your creative side! Do you have a favorite idea for an Arduino project? Tell us about it in the comments section below.
To know more, click here.
0 notes
Text
Latest Trends and Innovations in Embedded Systems
Embedded systems continue to revolutionize the way we interact with technology. From consumer electronics to industrial applications, the latest advancements in embedded systems are driving efficiency, connectivity, and performance like never before. In this blog, we delve into the latest trends and news shaping the embedded systems landscape in 2025.

1. The Rise of AI at the Edge
One of the most significant trends in embedded systems is the integration of artificial intelligence (AI) at the edge. Edge AI allows devices to process data locally, reducing latency and improving efficiency. This technology is particularly impactful in applications such as autonomous vehicles, smart manufacturing, and healthcare.
Recent developments include:
Enhanced processing power in microcontrollers (MCUs) and system-on-modules (SoMs) to support AI workloads.
Tools like TensorFlow Lite and PyTorch for optimized AI model deployment on edge devices.
Use cases such as predictive maintenance, real-time object detection, and voice recognition.
2. Matter Standard in IoT
The Matter standard is shaping the future of IoT by enabling seamless interoperability between smart devices. Embedded engineers are leveraging this standard to create smarter, more user-friendly products.
Key highlights:
Major players like Apple, Google, and Amazon adopting the Matter standard.
Increased focus on security and scalability for smart home and industrial IoT (IIoT).
Development of Matter-compliant devices to ensure compatibility across platforms.
3. Open-Source Hardware Gaining Momentum
Open-source hardware is enabling engineers and hobbyists to accelerate development cycles while reducing costs. Platforms like Raspberry Pi, Arduino, and BeagleBone remain popular, but new entrants are offering specialized solutions for complex embedded applications.
Noteworthy updates include:
Growth in community-driven projects for niche applications.
Availability of development kits with pre-configured software and hardware.
Increased adoption in education and prototyping.
4. Low-Power Design for Sustainability
Sustainability is becoming a cornerstone of embedded system design. Low-power solutions are critical for battery-operated devices, wearables, and IoT sensors, ensuring prolonged operational life and reduced energy consumption.
Recent breakthroughs:
Advanced low-power MCUs like the ARM Cortex-M series.
Innovative energy harvesting techniques for self-sustaining devices.
Design strategies focusing on dynamic voltage scaling and efficient power management.
5. Advances in Real-Time Operating Systems (RTOS)
Real-Time Operating Systems (RTOS) are crucial for time-sensitive applications, such as robotics, aerospace, and medical devices. Recent updates in RTOS focus on improved security, scalability, and ease of integration.
Notable advancements:
Enhanced support for multi-core processors.
Lightweight RTOS options for constrained devices.
Growing popularity of platforms like FreeRTOS and Zephyr.
6. Embedded Security Takes Center Stage
With the proliferation of connected devices, embedded security is more critical than ever. The latest security measures are aimed at protecting data and ensuring device integrity.
Recent updates:
Adoption of hardware security modules (HSMs) for cryptographic operations.
Implementation of secure boot and trusted execution environments (TEEs).
Compliance with standards like IEC 62443 for industrial security.
Conclusion
The embedded systems industry is evolving rapidly, with innovations driving smarter, more efficient, and secure solutions. Staying updated on these trends is vital for engineers, developers, and businesses aiming to remain competitive in this dynamic field. From Edge AI to sustainable designs, the future of embedded systems holds immense potential to transform industries and improve everyday life.
Stay ahead with our insights on embedded technology trends. Contact us today to explore how we can help bring your embedded vision to life!
0 notes
Text
Final Semester 15-week post
To create full fledge finalized prototype I need to:
Improve the playability of the buttons (Make sure they work consistently
Change the design to make it more user-friendly
Move the start buttons closer to the controllers to make it easier for players to hit
Experiment with different button layouts - see if you can remove the wristbands to make it more player friendly
Experiment with other control types - lightgun technology, DDR, Rythm,
I plan on creating at least 2 different game setups (controller experiences) - One is the 3 player button game and another I'm planning on trying to create a lightgun-type game (use gun to shoot at things)
EDIT: Will start documenting 3 Player Bishi Bashi game design process (setup 1) as well as steps needed to create 4 player lightgun (setup)
Step 1: Finishing modding all lightguns (2 guns done - need to get 2 more done for 4 player setup)
Need to get soldering materials
Documentation on guns and what buttons do what
Order parts to mod gun for Computer - Camera module +Arduino + Fisheye lens + IR sensors
Test out guns with PC setup (Make sure the TV you have is compatible with display port output, as well as compatible mini pc, speakers, power extension plug, etc.
Get a big enough folding table to fit the TV (Make sure TV is big so 4 players can play the game comfortably
Get Gaia Attack 4 (4 player lightgun game) working on a mini pc (might run into compatibility issues)
Deadline: 12/20
Step 2: Alter the 3 player button controllers (Bish bashi custom controllers) so that they use normal arcade buttons (much more functional than makey makey controller as playdough dries out easier)
Cut holes into boxes to make them fit the 6inch arcade buttons (will have to gut out the old makey makey alligator clips)
Make sure all parts work properly (need wires to plug into buttons, keyboard encoder to plug into pc (make sure its compatible with MAME arcade emulator)
Get a glue gun to super glue buttons into cardboard box (make sure it has a good weight and feel to it - easier to use)
Playtest with people to make sure the buttons can withstand abuse (dosen't break easily - this is important because need to make sure the buttons last long enough to be fully functional for Capstone Project Showcase at end of semester)
Deadline: 1/7
Upload documentation of work on tumblr and bring in newly made controllers to show off in class next semester
0 notes
Text
Top 10 Must-Have ICs for Your Next Electronics Project
Integrated Circuits (ICs) have revolutionized electronics, making complex circuitry compact, affordable, and more reliable. Whether you’re working on a hobby project or designing a professional application, certain ICs are essential for building efficient and functional devices. Here, we’ll go over ten must-have ICs that can elevate your next electronics project.
1. 555 Timer IC
The 555 Timer is a versatile IC known for its wide range of applications, from timing to pulse generation. It’s used in both monostable (one-shot) and astable (continuous) modes, ideal for creating oscillators, timers, and even light flashers. It’s a staple for DIY electronics projects and is compatible with numerous applications.
2. LM317 Voltage Regulator
The LM317 is an adjustable voltage regulator IC that provides a stable output. This IC can regulate voltages from 1.25V to 37V, making it essential for power management in electronic circuits. Ideal for custom voltage needs, it’s useful in battery charging circuits, power supplies, and adjustable voltage systems.
3. ATmega328 Microcontroller
This microcontroller IC powers Arduino boards, making it a favorite among hobbyists and professionals alike. It’s programmable with various I/O pins, analog-to-digital converters, and PWM capabilities, perfect for projects that involve data processing, motor control, or IoT applications.
4. Operational Amplifier (Op-Amp) IC: LM741
The LM741 Op-Amp IC is a general-purpose operational amplifier widely used in analog electronics. It amplifies weak signals and is commonly employed in sensors, audio applications, and signal processing. With a wide frequency response and minimal distortion, it’s an essential IC for audio and measurement circuits.
5. 4017 Decade Counter IC
The 4017 Decade Counter is a popular IC in applications where sequential LED lighting or timing control is required. It’s often used in combination with the 555 Timer to create light chasers or display counters. This IC finds applications in counters, timers, and LED displays.
6. ULN2003A Darlington Transistor Array
For projects involving motors, relays, or high-current components, the ULN2003A is invaluable. This Darlington transistor array provides the necessary current amplification to control multiple loads from a single microcontroller or sensor. It’s often used in stepper motor drivers and relay control applications.
7. NE5532 Audio Amplifier
The NE5532 is an audio amplifier IC with excellent noise performance, making it ideal for high-fidelity audio applications. Its low distortion and wide frequency response suit it well for audio mixing, preamplifiers, and general sound processing tasks. Audio engineers and hobbyists alike rely on this IC for quality sound amplification.
8. LM3915 Dot/Bar Display Driver
If you’re creating visual indicators, the LM3915 is a great choice. This IC is used to drive LED bar graphs or dot displays, making it a favorite for visual VU (Volume Unit) meters or battery level indicators. With its easy cascading options, it’s well-suited for applications needing multiple LED levels.
9. MAX232 Serial Communication IC
The MAX232 is crucial for projects involving RS-232 communication. It converts signals from a serial port to signals suitable for TTL-based digital logic circuits. This IC is essential for any project requiring serial communication, like microcontroller-based systems or data transfer applications.
10. ESP8266 Wi-Fi Module
For IoT projects, the ESP8266 Wi-Fi Module IC is a game-changer. This IC provides Wi-Fi capabilities to microcontroller-based projects, allowing remote control and data monitoring. It’s widely used in smart home applications, sensor networks, and any project that requires wireless data transfer.
Conclusion
These essential ICs provide versatility, reliability, and functionality, which makes them indispensable in electronic projects. Whether you’re building a simple timer, creating complex IoT devices, or designing audio applications, these ICs are vital tools. Stocking up on these components will ensure your toolbox is ready for almost any project that comes your way.
If you’re looking to get started with these ICs, you can find a wide selection and Buy Electronic Components Online from Blizzcartz. For more details and the best prices, check out Electronic Components Online in India.
#Buy Electronic Components Online#Best Prices for Electronic Components in India#Electronic Components for DIY Projects
0 notes
Text
Arduino-Compatible Sensors and Modules | Diykit Solutions
Explore Arduino-compatible sensors and modules at Diykit Solutions! Unleash your creativity with our diverse DIY kits in electronics and robotics, featuring high-quality materials from trusted suppliers.
Arduino-Compatible Sensors and Modules
1 note
·
View note
Text
Infrared Obstacle Avoidance Sensor Module
Table of Contents: Overview of the Infrared Obstacle Avoidance Sensor Module Key Features of the Infrared Obstacle Avoidance Sensor Module Applications in Robotics and Automation How the Infrared Obstacle Avoidance Sensor Works Why Choose Our Infrared Obstacle Avoidance Sensor Module? Product Specifications Installation and Setup Guide Compatibility with Arduino and Raspberry Pi FAQs 1.…
0 notes
Text

4G/LTE GNSS / BLE 5.0 Module
SIMCOM A7672S based LTE CAT1/GNSS/BLE modem compatible with Arduino
Host Interface: UART / USB interface for AT commands
Secured connectivity, 6DoF, Barometer sensors as option
On-board BLE antenna, On-board / External GPS antenna option
Operating voltage of 5V±10%
Operating temperature: -30°C to +70°C
Supports Free RTOS based Open CPU SDK for custom application development
0 notes
Text
Esplora Arduino game controller

The ESPLORA Arduino game controller Board is an Arduino-compatible microcontroller board based on the Arduino Leonardo. Unlike previous models, it comes equipped with a variety of built-in sensors for immediate use in interactions.
This guide is perfect for individuals interested in using Arduino, but who don’t want to dive into electronics right away. To learn how to use the ESPLORA Arduino game controller Board in a simple and clear manner, be sure to read the Getting Started with Esplora guide.
The ESPLORA Arduino game controller Board boasts onboard sound and light outputs, as well as multiple input sensors such as a joystick, slider, temperature sensor, accelerometer, microphone, and light sensor. Additionally, it offers the option to enhance its functions through two Tinker-kit input and output connectors and a socket for a color TFT LCD screen.
Similar to the Leonardo board, the ESPLORA Arduino game controller Board also utilizes an Atmega32U4 AVR microcontroller with a 16 MHz crystal oscillator. It features a micro USB connection that can function as a USB client device, such as a mouse or keyboard. Additionally, there is a reset push button located in the upper left corner of the board for restarting purposes.
There exist four indicators, each displaying a different status.
The green indicator shows if the board is currently being powered.
The L [yellow] connects directly to pin 13 on the micro-controller for easy accessibility.
The [yellow] LED indicates data being transmitted or received through the USB connection.
Within the board lies all the necessary components to support the microcontroller. To begin, just connect it to a computer using a USB cable. The ESPLORA Arduino game controller Board is also equipped with built-in USB communication, allowing it to function as a mouse or keyboard when connected to a computer. It also offers a virtual serial/COM port (CDC). This alters the behavior of the board, which is further explained on our getting started page. On this page, you can find all the instructions for configuring your board and utilizing the Arduino Software (IDE) for coding and electronics experimentation.
The transfer of data, both in and out.
The ESPLORA Arduino game controller Board features a classic gamepad design, including an analog joystick on the left and four push buttons on the right. It also comes equipped with several onboard inputs and outputs:
The analog joystick features a center push-button and two axes, designated as X and Y. There is also a central pushbutton for added functionality.
Arranged in a diamond formation are 4 push-buttons.
The slider for the linear potentiometer is located towards the bottom of the board.
A tool to capture the volume (amplitude) of the surrounding environment.
A sensor that detects light to measure brightness.
The temperature sensor measures the surrounding temperature.
A three-axis accelerometer detects the orientation of the board with respect to gravity, along the X, Y, and Z axes.
The buzzer has the ability to generate square-wave tones.
The RGB LED features Red, Green, and Blue elements that allow for color mixing and a bright display.
The TinkerKit Inputs allow for easy connection between the sensor modules and 3-pin connectors.
The TinkerKit Outputs allow for easy connection of the TinkerKit actuator modules via the 3-pin connectors.
The TFT display connector can be used for a color LCD screen, SD card, or any other devices utilizing the SPI protocol.
To fully utilize all available sensors, the board employs an analog multiplexer. This way, multiple input channels (excluding the 3-axis accelerometer) can share a single analog input of the microcontroller. Selecting which channel to read is done through four additional pins on the microcontroller.
Communication is essential in any relationship, whether it be personal or professional. It plays a crucial role in maintaining strong connections and fostering understanding between individuals. Effective communication allows for open and honest dialogue, facilitating problem-solving and building trust. Without good communication, misunderstandings can occur, leading to conflicts and strained relationships. Therefore, it is important to prioritize effective communication in every aspect of our lives.
The ESPLORA Arduino game controller Board for the Leonardo offers various features for connecting with a computer, another Arduino, or different micro-controllers. The ATmega32U4 enables serial (CDC) communication through USB and is recognized as a virtual com port on the computer. It also functions as a full speed USB 2.0 device and can be used with standard USB COM drivers. A .inf file is needed for Windows.
The Arduino software comes equipped with a serial monitor for easy transmission of text data to and from the board. Whenever data is being sent via the USB connection to the computer, the RX and TX LEDs will light up on the board. Additionally, the ATmega32U4 has SPI capability accessible through the SPI library. In addition, the Esplora can act as a standard keyboard and mouse, allowing you to use programming to manage these input devices via the Keyboard and Mouse libraries.
The act of creating computer software, also known as programming, involves writing code using various languages and tools. This process requires a combination of problem-solving skills, critical thinking and creativity. Programmers must constantly learn new techniques and adapt to ever-changing technology in order to produce high-quality programs.
To start using the Esplora with your Arduino software (download), simply choose “Esplora” from the Tools > Board menu. For more information, refer to the getting started page. The ATmega32U4 on the Esplora comes pre-loaded with a boot-loader, enabling you to upload new code without an external hardware programmer.
The AVR109 protocol is the chosen method of communication. To avoid using the bootloader, you can program the microcontroller through the ICSP header. Additional instructions are available for reference.
A dedicated library for the Esplora simplifies writing sketches, with methods available for reading sensors and controlling onboard outputs. These high-level methods also perform pre-processing of data, such as converting temperature readings to degrees Fahrenheit or Celsius. Additionally, the library allows easy access to outputs like the RGB LED. For further information and examples, please refer to the Esplora library reference page.
The automatic reset and bootloader activation are key components in the software’s functioning.
Rather than relying on the physical reset button, the Esplora utilizes a software-based reset triggered by opening and then closing the virtual serial/COM port (CDC) at 1200 baud. This initiates a processor reset, temporarily cutting off the USB connection to the computer and causing the virtual port to disappear. The boot-loader remains active for approximately 8 seconds before it can also be activated by pressing the reset button on the Esplora.
Please be aware that upon initial power up, the board will launch the user sketch instead of the boot-loader, if available. Due to the specific reset process of the Esplora, it is most effective to allow the Arduino software to attempt a reset before uploading, especially if you typically press the reset button before uploading on other boards. However, in the event that the software is unable to reset the board, you can manually initiate the boot-loader by pressing the reset button on the board.
The USB port is equipped with overcurrent protection to prevent any potential damage.
The ESPLORA Arduino game controller Board comes equipped with a re-settable poly-fuse to safeguard your computer’s USB ports against shorts and over-current. While most computers have built-in protection, the fuse adds an additional level of security. In the case of a short or overload exceeding 500 mA, the fuse will disconnect the connection until the issue is resolved.
Regarding the appearance of this object, its external features will be discussed.
The ESPLORA Arduino game controller Board PCB has a maximum size of 6.5 inches in length and 2.4 inches in width. The USB and TinkerKit connectors extend beyond the width dimension. Additionally, there are four screw holes that allow for attachment to a surface or case.
1 note
·
View note
Text
Arduino Pro Mini 328 5V/16Mhz - Compact Powerhouse for Your Projects!
Unleash your creativity with the Arduino Pro Mini 328, a small yet powerful microcontroller board designed for DIY enthusiasts and professionals alike! With its 5V operating voltage and 16MHz clock speed, this board offers the performance you need for a wide range of applications, from robotics to home automation.
Key Features:
Microcontroller: ATmega328P - the same chip as the popular Arduino Uno.
Operating Voltage: 5V - ideal for compatibility with most sensors and modules.
Clock Speed: 16MHz - ensures fast and reliable operation.
Compact Size: Perfect for space-constrained projects where every millimeter counts.
Low Power Consumption: Efficient design for battery-operated projects.
Whether you're building a smart gadget, a sensor network, or an interactive art piece, the Arduino Pro Mini 328 is your go-to board for reliable performance in a tiny footprint. Ready to take your projects to the next level? Get yours today and start innovating!
Click here to purchase the product: https://dhakarobotics.com/.../1007-arduino-pro-mini-328.../
Contact Us: +8801740298319
visit our website: https://dhakarobotics.com/
##########

0 notes